Showing posts with label upcycling. Show all posts

Saturday, 29 November 2014

#secondhandfirst - days 6 & 7

I know it's a little late but here's #secondhandfirst days 6 and 7!  I was away visiting my folks that weekend, then spent a couple of days in London, then came back to Edinburgh to my mother in law visiting so it's been a pretty mental but enjoyable week!

20141122_152438

Day 6 - thrifted material-come-handmade t-shirt!  So proud of this make, my Dad commented on how much he liked my t-shirt (which almost never happens, I could pretty much wear a bin sack and he wouldn't notice) and I got to say, "I made this!"  So proud!  Bonus points for handknit cardigan maybe?  It's Coraline by Ysolda, you can see my Ravelry notes over here.

Amy 4

Day 7 - you're probably all completely bored of this make but whatevs, I love it so much.  It's my refashion men's fairisle sweater to cardigan and I wear it all the time.  I have another sweater lined up to try this again, fingers crossed it's a success the second time round.

Overall, I've really enjoyed #secondhandfirst week from Traid, it's been a good motivation to involve more secondhand in my every day outfits.  I haven't been actively thrifting for clothes for me for a while but I went charity shopping with my mother in law this week and found a pair of Gap jeans and a Denim Co check shirt for £7 for the pair.  Score!  #secondhandfirst has definitely got me firmly back in the thrifting game.  It's also made me recognise a few holes in my wardrobe so I now have a list of items to keep my eyes peeled for in the charity shops.  A win all round I think.

Sunday, 14 September 2014

Hand made bunting from floral fabrics

I recently bought this amazing string of hand made bunting from Lapin Gris Vintage.  Based in Devon, Lapin Gris specialises in vintage themed lovelies for your home.  From scented candles in vintage jelly moulds, to 1950s framed adverts, to chintzy cake stands, Lapin Gris has it all.  You can check out the website here, facebook here and twitter here.

20140902_140740

20140902_140753

20140902_140900

I love the floral fabrics, the bright colours make them less twee and more fitting with my personal style.  I like some floral chintz in my home, but too much pastel and flowers can be a bit granny if you're not careful.  The blue polka dot string is just too cute as well.

Check out Lapin Gris Vintage, either via t'internetz or if you're lucky enough to be in Devon, in any one of the many vintage and craft fairs they frequent!

Disclaimer: I bought my string of bunting, all views are my own.

Tuesday, 2 September 2014

Refashioned men's wool fairisle sweater

I saw a link recently on Charity Shop Chic, that lead me to Sew Amy Sew.  Sew Amy Sew is hosting a 'Repurpose, Reuse, Refashion' challenge for 'sewists to do your bit to minimise waste!'  This suits me down to the ground, I thought, so I went rummaging in my stash trunk for some unloved charity shop find to repurpose.  I've been doing pretty poorly in my New Year's Resolution to sew more, so this little competition was exactly what I was looking for to get me started on sewing again.

20140824_144629

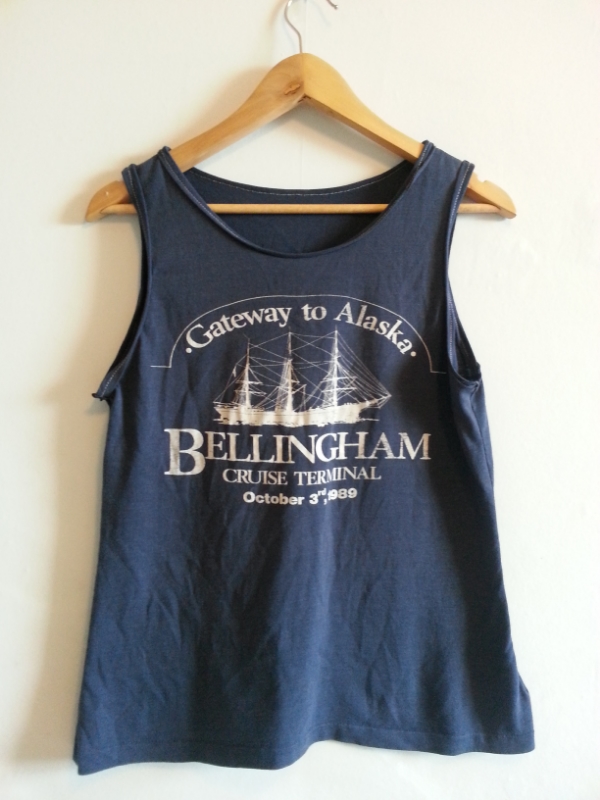
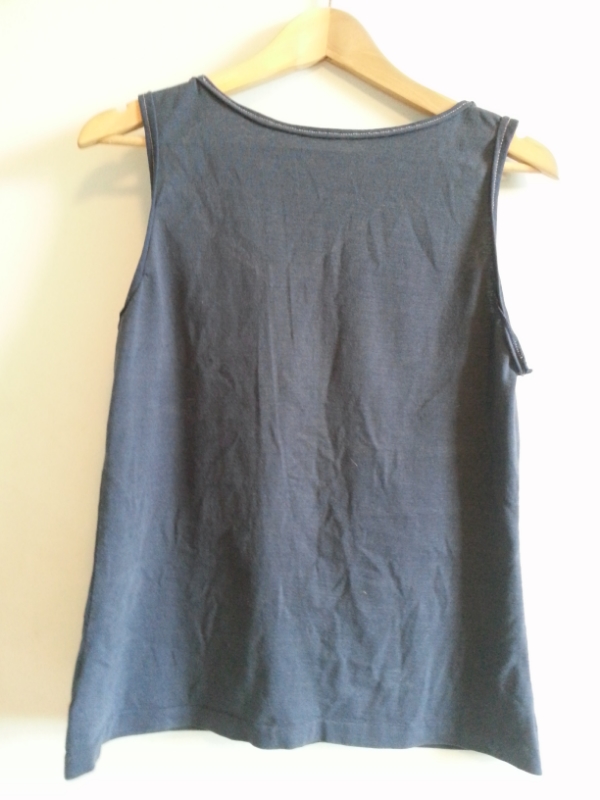
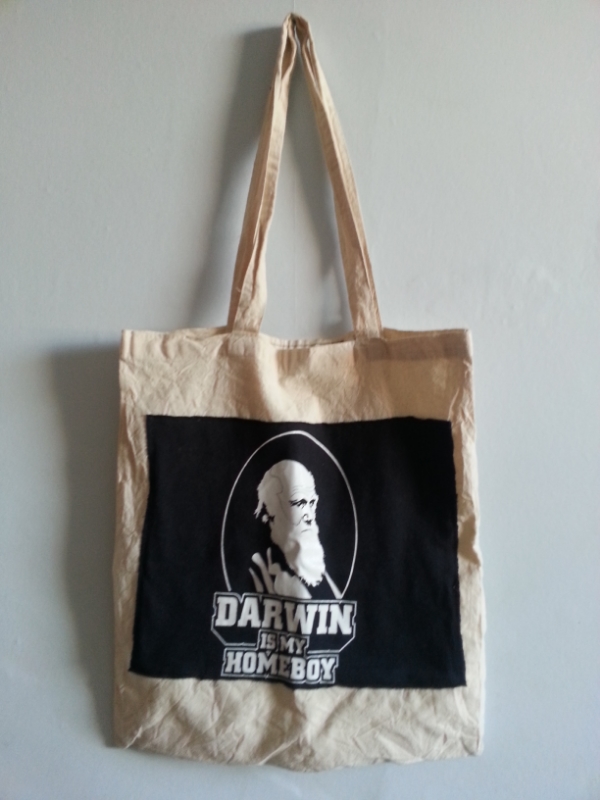
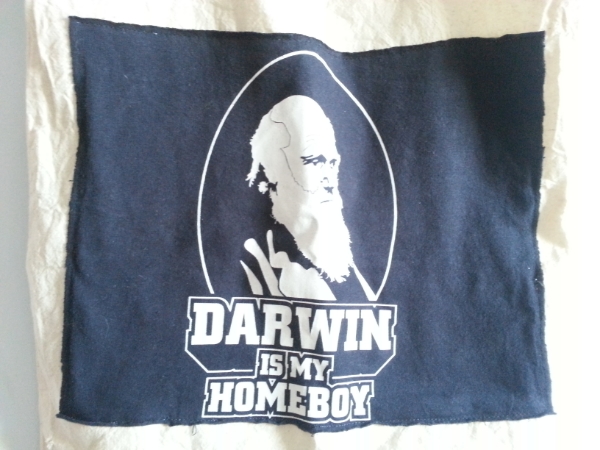
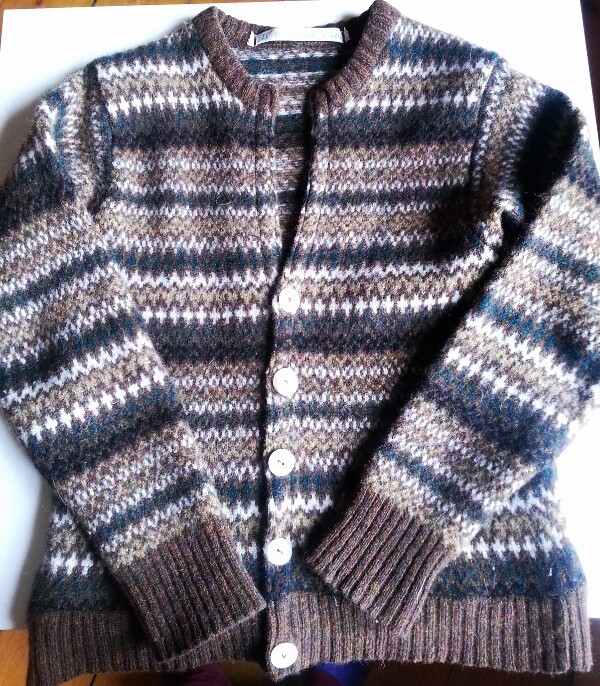
I started with this amazing fairisle 100% wool sweater I thrifted for 99p from a charity shop in Mussleburgh.  I've been planning on converting it to a cardigan for years, after being inspired by this amazing cardigan refashion from April Leino.  The idea behind her cardigans is that everything is recycled from previously discarded clothes, so it's completely sustainable and creates something new and interesting from something disposable.  I love that ethos, so much of our fashion these days is treated as expendable, without a thought for the huge amounts of energy, resources, time and money that have gone into turning it from cotton on a plant or wool on an animal, into a wearable item of clothing.  I love charity shopping, but sometimes it's depressing to see row after row of the same poorly made, disposable cotton t-shirts or baggy, acrylic jumpers.  Not to mention the thousands of tonnes of similar items that never make it to charity shops and instead head straight to landfill.  Now that I have a bit of disposable income, I try and buy as good quality and long lasting as I can afford (when I need or have to buy new) with a view to getting it fixed in the future to prolong its life.  That's why I bought my Barbour and Ten Point shoes, the Barbour can have the zip and poppers replaced and rewaxed every 2 years and the Ten Points can be resoled and zip replaced if necessary.

IMAG0765

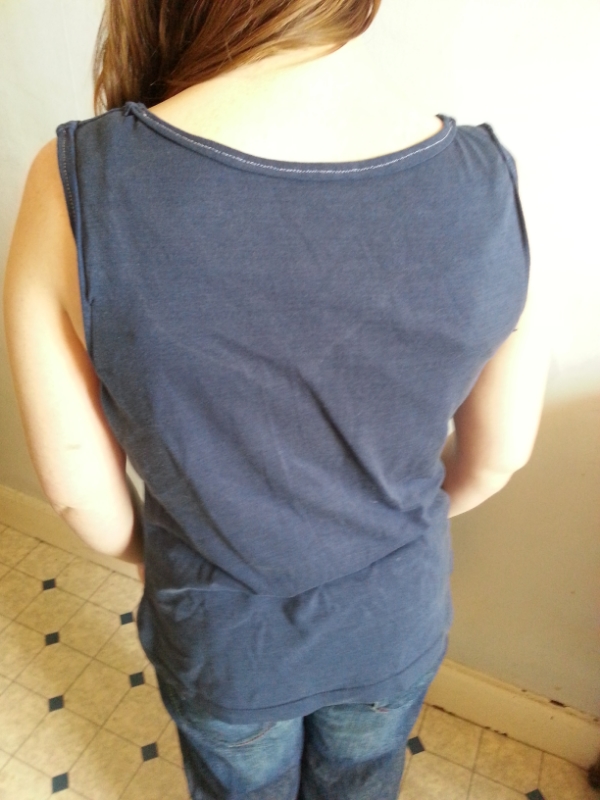
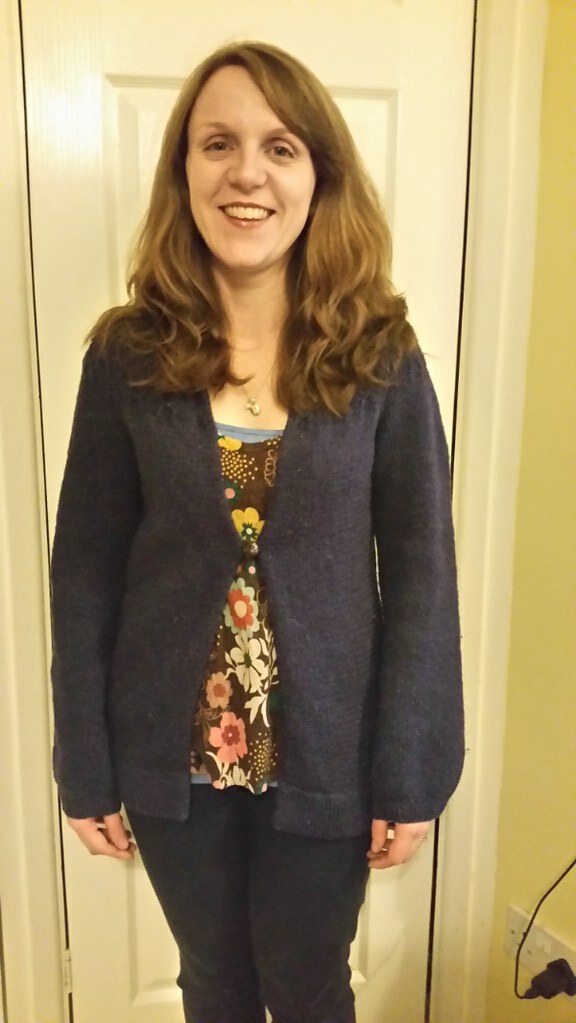
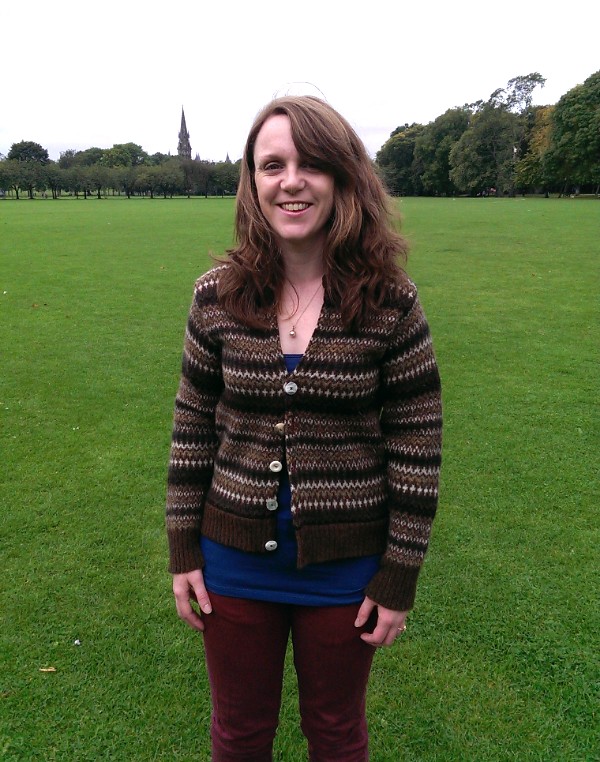
It's honestly not wonky at the bottom in real life, promise!  Clearly wearing it my standard one-button-under-the-boobs isn't the best look for this cardi

After refashioned men's fairisle sweater by Craft & Thrift

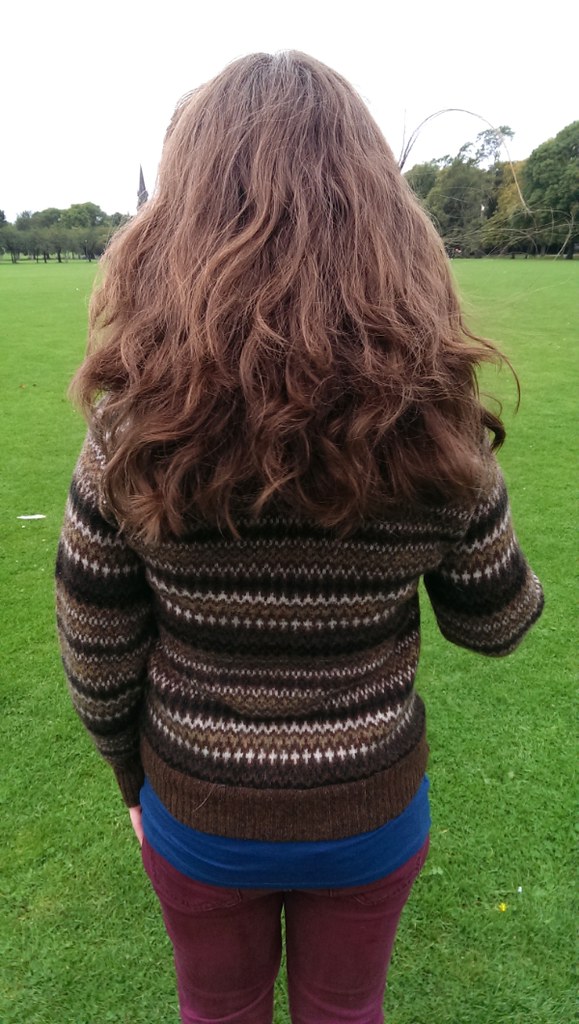
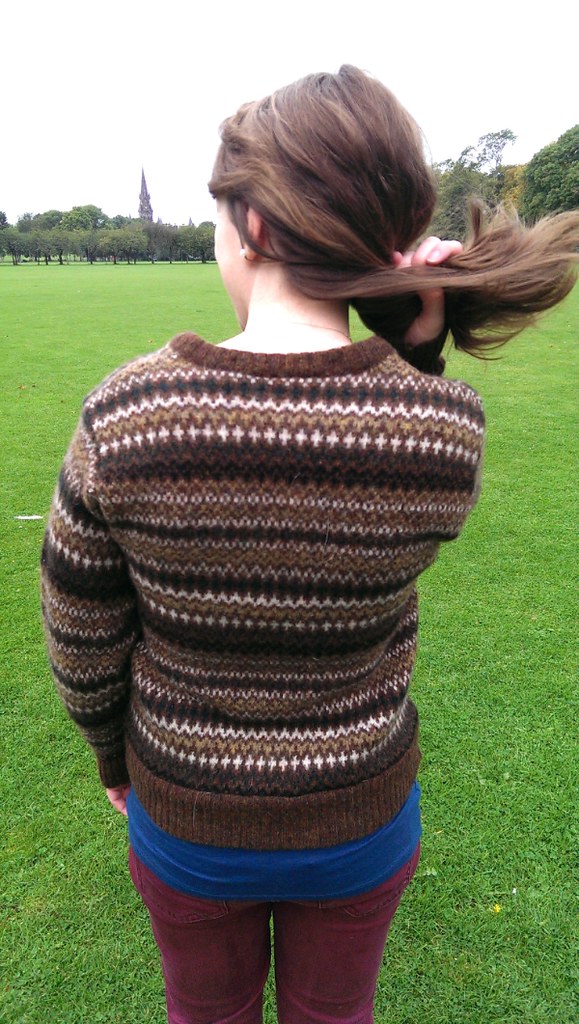
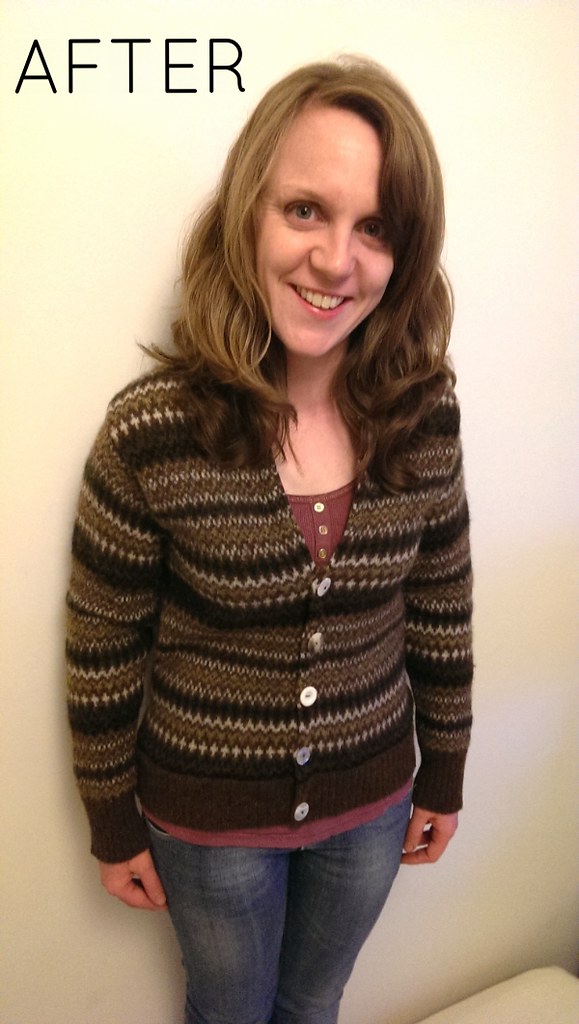
The 'After' taken in a rush last Thursday night in a bid to get my competition entry in on time!  But proof that it's not wonky at the bottom, promise!

Anyway, back to the sewing.  I started by removing the sleeves and taking them in along the side seam.  I shortened the shoulders and recut the armhole to match my smaller sleeve head.  I then replaced the newly sized sleeves back into the smaller armhole and sewed up the side seam to compensate for the smaller armhole.

20140902_140051

20140902_140038

IMAG0770

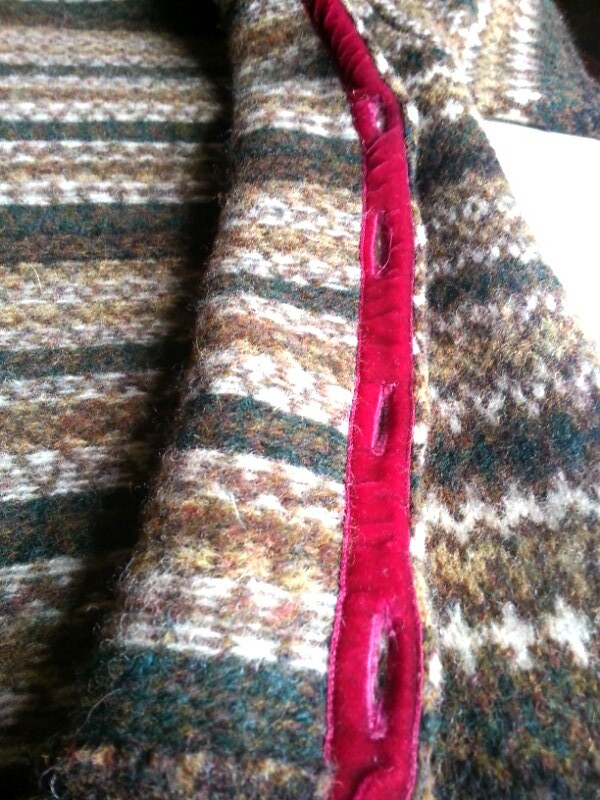
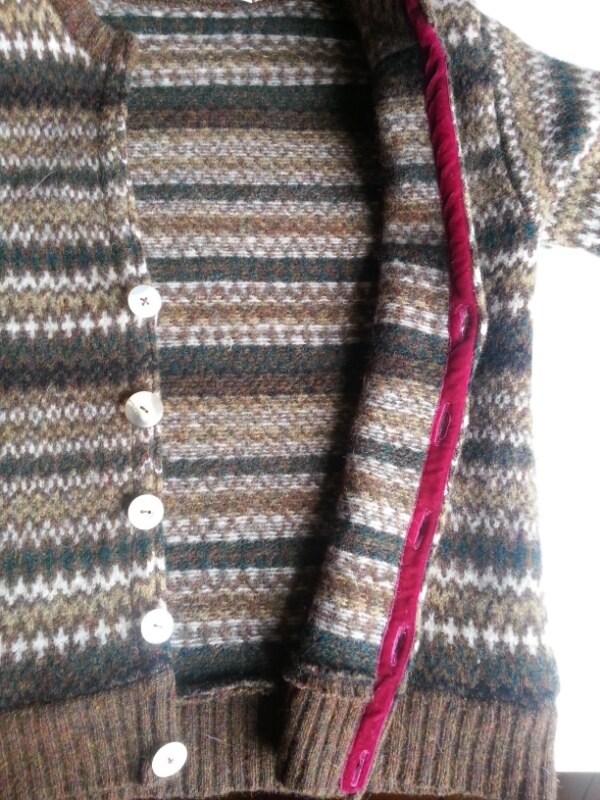
I then cut up the centre and turned in as small a hem as possible, since the fit around the body was already pretty good.  I pinned some gorgeous purple velvet ribbon over the top of this hem and sewed it down, partly to reinforce the button bands and partly to give a more professional finish by hiding the hem.  I love the look of wool and velvet together, it's so sumptuous and warming.

IMAG0775

The length was a bit long for me, so I cut off the bottom cuffed hem, marked on where I'd like the bottom hem to sit and cut off the corresponding strip of fairisle in the middle.  I then resewed the cuff back on, this time higher up.  If anything it's now slightly too short (didn't factor in seam allowance, facepalm) but not enough to stop me wearing it.  It's actually grown slightly since blocking as well, so has ended up at a near-perfect length.

IMAG0777

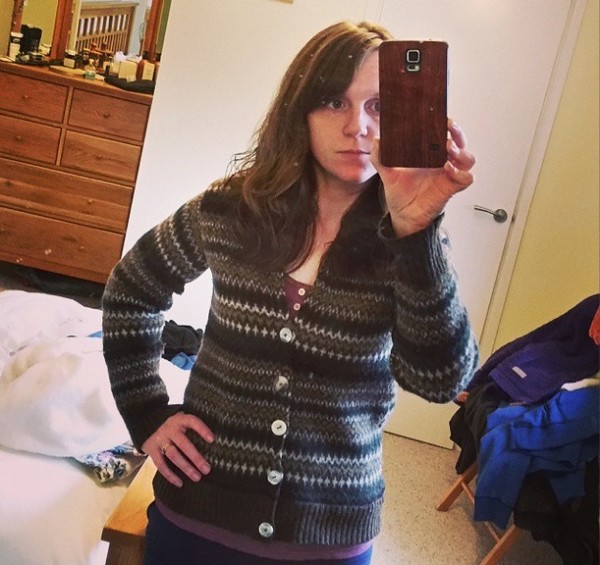
I normally wear a cardigan done up halfway, or even just with one button fastened under the bust.  Since the fit around the body was now pretty snug, I elected to just do buttons halfway up the body, to give a V neck appearance.  No point putting buttons all the way up to the collar, if I'm never going to use them!  I say thrifty, you say lazy.  The buttons are all from my stash, I didn't have 5 matching so I went for purposeful mismatch instead.

20140902_140106

20140902_140202

All that was left at this point was to remove the '90s, dirty, frumpy label and replace it with one of my own, left over from my Etsy shop days.  Oh, and darn a couple of holes in the cuff using my mad surgical skillz.  I've already worn this so much, I can tell it's going to be a hit for the winter.

20140902_140352

IMAG0769

I've got a couple more wool sweaters to refashion as well, this little project has given me the confidence boost I needed to get going.  It was amazing how easy it was to fit into my life, in the past I've spoken about why I've struggled to learn to sew, with one of the main issues being finding time.  This project was perfect, 15 minutes here, 20 minutes there and it was done in a week.  I think I have this mental block about sewing, that I need a whole afternoon set aside to really get my teeth into a project.  Refashioning is so much easier than following a pattern as well, you just make it up as you go along, the perfect lazy persons sewing!

Tuesday, 26 August 2014

Craft & Thrift does hen party!

Last weekend was my hen do and much crafting, thrifting fun was had by all!  I wanted it to be quite relaxed, with the kind of activities my friends with babies could partake in, between feeds and changes.  You may have already seen some of these pictures if you follow me on Instagram but I thought I'd bring them all together here, with links to some of the projects and recipes we used.

056

One of my favourite things in the world is afternoon tea with cocktails.  I love me some baking, and baking with friends with the radio on in the background and sunshine streaming through the kitchen window, was perfect.  We had quite the spread, you can see the recipes used (or approximations thereof!) in the links below, or just drool over the pictures, whatever floats your boat!
Cocktails included Mojitos with homegrown mint and peach bellinis.  All served in my selection of thrifted china and glassware.  One of my new-to-me sets is the cups on the left there, you can see a close up of the plates below, how cute are they?  A total bargain from a charity shop, £3 for 3 cups, 3 saucers and 2 side plates.  Very Scandinavian inspired I think.

055

Next up - sugarcraft!  Taught by the lovely Heather of Heather's Cakes, we all learned how to make edible sugar icing roses, which will eventually end up decorating my wedding cake.  I was really pleased with the outcome of these, they look lovely all grouped together.  Everyone was worried their roses would be the bad one, but honestly I think they look amazing, we all did a great job!  If you're interested in making sugarcraft roses yourself, check out this Youtube video.  Or hire Heather, she's amazing.

050

From there more cocktails and food at mine and Andrew's favourite Bruntsfield Bar, Henricks.  We had our engagement party here and regularly visit with the dog, it's a lovely bar with a great selection of modern Scottish food and wine (amongst other beverages).  They make a lovely fuss of Badger, which always sells me on a venue.  And they're literally stumbling distance from my flat.

20140902_140618

20140902_140647

20140902_140630

Frances made me this amazing 'Bride' sash, hand sewn!  Mary Jane added to it with a hand sewn 'Bride to be' rosette. My friends are so creative and thoughtful!

From there, those of us left wandered into town for some more cocktails and free cabaret at Voodoo Rooms.  All in, it was an amazing weekend, I woke up on Sunday hungover and husky-voiced, but having had a brilliant time.

063

084

Sunday was craft recuperation time, so I finished off the last of the brooch bouquets and browsed my lovely photo album, handmade by Victoria literally as we went!  She brought an Instax camera with her and mounted the photos in the bars as we drank, getting my lady friends to write touching and silly notes along side each one.  That is dedication to your craft, right there.   

064

The brooch bouquets are finally done, I can't wait to show them off in a future post but I'm going to save it until I've got professional photos of them all.  They've turned out really well though, I'm really pleased I used fake flowers because I'll have my bouquet to keep forever.  It's going to be lovely to walk up the aisle carrying brooches from friends and family, plus some thrifted pieces with Frances and Victoria.  It's like a little piece of all areas of my life, together in a bouquet.  Only 4 weeks to go now...!

Tuesday, 8 July 2014

Thrifted Laura Ashley cushion cover

I thrifted this lovely upholstery weight, wool, check Laura Ashley material from Freecycle years ago.  If you're not on Freecycle and you're into sustainability, recycling and generally trying to live lightly on the planet, you should definitely get involved.  You join your local group and people give things away for free, to save them going into landfill.  It can be anything from old vacuum cleaners to tiles left over from tiling your bathroom, to sewing and knitting materials or off-cuts of carpet.  It's a great group and although I'm not as active in mine anymore, I definitely gave and received my fair share back in the day!

20140626_201134[1]

I received a bag of Laura Ashley curtain material from a lady in north Edinburgh and still have the odd bit floating around in my stash.  For this cushion, I was going for a hunting-shooting-fishing outdoorsy vibe, as a housewarming present for a friend who lives on a shooting estate in the country.  Homewares with animal silhouettes seem to be everywhere at the moment and I've always thought it would be something that would be easy to make myself.  I didn't have quite enough to make the front wide enough, so I had to cobble two bits together.  I'm pretty pleased with my pattern matching though, it's certainly not immediately obvious that's it's two pieces sewn together.  Recycling you guys!

20140626_201146

I used some golden yellow fabric, again from the stash (go me!) for the dog outline and back.  I inherited the yellow material from my friend Mary Jane after her parents cleared out some fabric from their farmhouse.  It's a lovely, golden yellow colour and complements the check material perfectly. 

20140626_201158

I wanted a simple, professional finish so I stuck to a style I knew I could do well i.e. no zippers or buttons!   Much as I love buttons on a cushion, I can't always guarantee that they'll turn out well and since this was a quick, stash bust project, I just wanted to keep it simple.  I appliqued on my dog, then sewed the front and back right sides together, leaving a hole to turn it inside out.  I then stuffed it with recycled stuffing from a dead pillow and hand stitched the hole closed.  Using the same stitching pattern I use to close a bitch spay.  Just so you know. 

20140626_201217

Overall, I'm really pleased with the finish.  It looks smart and the recipient didn't even realise it was handmade!  In retrospect, the dog looks a little chubby (or maybe pregnant) so next time I would give him more of a waist.  He is supposed to be a working dog after all.

Wednesday, 29 January 2014

Giant t-shirt to sleeveless top

I've been hoarding a few massive t-shirts for a while now.  They're all sentimental in some way, shirts I wore when I had my first boyfriend, or friends left behind when they moved away.  They're all baggy and old and in need of a revamp to turn them from something languishing in my fabric box to something I would actually wear out and about, but they all remind me fondly of a certain time in my life.  Ah, nostalgia.

022

This was a large boxy t-shirt I inherited when a friend emigrated at the end of vet school.  She's originally from Washington State so I pulled this one out of the charity bags she gave me to rifle through because it reminded me of her and the fun times we had together at uni. I should have taken a before picture, but imagine large boxy t-shirt.  You can do it.

025

I'm still practising sewing with jersey and I'm still struggling with the basics.  My seams never seem to be straight and quite often go weirdly ripply.  Although I pinned around So Zo's t-shirt to vest pattern to get the basic body right on this remake, the armhole openings still came out too big, despite the fact that they fit fine on my other makes with this pattern.  I guess it's because I made proper wide straps rather than using elastic, clearly I got the sizing wrong because they give me a slightly baggy-trucker look I think.  Also, looking at this photos I feel like I should have ironed this top, but then who seriously irons t-shirts?!

026

027

All in, not perfect but definitely wearable.  I've been wearing this a lot as a vest under my scrub top at work, for the warmth.  I can imagine in the summer it will be nice for beach walks with the dog, the kind of outdoor activity where I invariably end up in the sea so it's good to wear something you're not too attached to.  Definitely room for improvement, B- must try harder.

Tuesday, 10 December 2013

Take 2 sweaters, combine to form 2 cushion covers

This is another project from the Guilt Pile (which magically never seems to get smaller, despite finishing or discarding several projects recently that have been festering in there for months).  Years ago, when I first started sewing, I made several cushion covers (a beginner sewist's staple) that have been used in various flats and on various sofas and chairs until their final resting place in our current flat in the kitchen.  They were a combination of jeans-to-cushion covers, with natty red ribbon and lightening bolts and blue cotton tie-dye and flower appliqué.  I took a photo to show you all but they're honestly so faded and holey that it was too embarrassing to post them on the internet.

050

So instead, you can see the new, upcycled sweater cushion covers that have replaced them!  I combined the cushion pads from the old cushions to make 2 new cushion inners from 4 old pads, they were too flat and uncomfortable to make 4 new cushions but combining them into pairs makes for very fluffy, comfortable cushions.

051

The cable sweater is one my Mum knitted me years ago and I wore until it started dropping to pieces.  I couldn't bear to part with it but it was looking very 'heroin-chic' as one friend put it i.e. holey and stained with lots of loose bits of yarn and bobbles.

052

The blue sweater was my favourite 100% wool sweater for seeing practice when I was a vet student, it was smart and went with all my shirt.  Unfortunately when both elbows and the cuffs disintegrated, I knew it was time to move on.  It was originally £3 from a charity shop though so it didn't owe me anything.

053

This was a down-and-dirty project, a whip-up-in-one-evening type affair.  As a result, the corners especially are quite wonky but sometimes you just want a quick fix without worrying too much about matching seams and professional finish, y'know?  Especially with my job at the moment, I get so little time for sewing that it's nice to just cut out and finish a project in one sitting, otherwise it might be weeks until I get another chance to finish it off.  Plus, 4 crappy old cushion covers out of my Guilt Pile and 2 new comfy cushions for my darling behind to rest upon.  Win!

Thursday, 5 December 2013

Countdown to Christmas!

043

It's only 20 days until Christmas everybuddy!  We bought and put up our Christmas tree this weekend and I'm going to use the leftover branches to make a wreath next weekend.  I also dug out our advent calendar, one of the first of my 'proper' craft projects (i.e. more than just an oddly shaped rectangle I called a 'scarf') made about 7 years ago.  Despite how amateur and wonky it looks now, I still love it, it's so bright and Christmassy.  Every year I buy a tin of Roses and put 2 sweets in each pocket.

045

044

Sometime soon I'm going to replace the horrid wire coat hanger with something more smart, but every time I go to replace it, I get all nostalgic for my early crafting days and leave it as it is.  The backing white fabric was originally a table cloth and all the beads and fabric were from my early stash.  I still have some of these squares left over!

046

I love holiday traditions.  I'm working over Christmas this year so I'm determined to enjoy the festive season these first 2 weeks to make up for missing out on Christmas week itself!

Sunday, 1 December 2013

Teacup pincushion

If you follow me on Pinterest, you'll see I've been pinning teacup pincushions recently.  It's all part of my grand Christmas plan to bring a handmade touch to some of my presents, without going overboard and crafting huge amounts of items and stressing myself out.  Last year I made a skirt, a jumper, a scarf, a snood and several baby toys, with the end result being hours of frantic knitting and sewing, sweating over my needles and giving myself hand cramp.  Now, don't get me wrong, I love making things for other people.  But the problem with Christmas is you need to make so many things ALL AT ONCE.  Rather than birthdays, where it's individual items spread throughout the year.

033

This year I decided to keep the handmade-by-me to a minimum and instead try and buy presents from other craftspeople.  What little crafting I intend to do will be small pieces to compliment bought gifts, rather than the main present itself.

030

So, enter the teacup pincushion!  I'm making my Mum a sewing basket, once it's done and finished it'll be the subject of a future post but in the meantime, I was excited to share my pincushion just now!

031

I went through a phase of collecting blue and white china, a hobby I intend to revisit once I live in a rambling farmhouse in the country 20 years from now, but for the moment I live in a 2 bedroom tenement and so don't really have space for slightly impractical sets of teaware.  Not that I haven't used my china, over the years I've thrown several tea parties for the Royal Wedding or the Diamond Jubilee but if I'm being honest with myself, it's a big box taking up room in the cupboard that could be put to better use for the time being.  So I've decided to upcycle as much of the china as I can.

032

Most of it was acquired from auctions or charity shops and none of it was expensive, I have in mind this little guy cost me around £1.49. The beads, material and stuffing were from my stash so this is a proper thrifty project.  I googled several tutorials for teacup pincushions before starting and took the basic concepts on board to make my own.  This was attempt 2, attempt 1 ended up in the bin after trying unsuccessfully to glue the pearls around the edge.  The glue went everywhere, including my table and fingers and just looked awful.  The second attempt I glued in the cushion but sewed on the pearls, which looks much nicer.  I'm debating whether or not to glue the cup to the saucer or whether it will be more flexible to be able to separate them as needed.  I could see Mum using the saucer for thimbles and chalk so I might just leave them unattached.  I want to make one for myself now!

Tuesday, 26 November 2013

A cautionary tale of woe

Oh my goodness, what a week!  Do you ever have one of those weeks where you suddenly realise it's 7 days later than when you last noted the date, but you've got no idea what happened in that time?  It's just been a wirlwind of work and sleep and work and sleep, it's been a craft-poor week that's for sure.

006

I've got several projects to share with you but need to wait until I'm home in daylight to take photos.  So you might get to see them sometime next March.  In the meantime, here's an oldie from the summer that I finally got round to fixing so I can use it.  Do you ever have those Guilt Pile projects that sit there for months (sometimes years) before you get round to fixing them, at which point it only takes you 10 minutes and you wonder why you've been putting it off for so long?  This was one of them.

093

It all started with a t-shirt my brother gave me years ago.  As a science geek, I love it, but I never wear black and it was that super-tight, super-short, '90s style t-shirt that's not really my scene.  So it languished in a drawer for a while until I decided to sew the design onto a tote.  I got a free tote bag from a wedding fair, emblazoned with a dentist logo of all things, and decided to cut it out and stitch it on.  Simple, no?

094

I did it all properly, with iron-on interfacing for stablising the jersey fabric and made sure to make it as square as possible.  I was really pleased with how it turned out.  Then I washed it and the jersey shrank at a different rate to the tote bag (this is why we pre-wash things, I see now), leaving me with unattractive puckers in the corners of the design.  If there's one thing Darwin hated, it was unattractive puckers.

041

So, it's sat in my Guilt Pile for the past 6 months, until I finally unpicked the design, ironed it, ironed the bag and resewed in back on.  And now it's usable!  10 minutes of work and I could have had a bag 6 months ago.

042

So much better!  Not a pucker in sight.

So, listen to my cautionary tale of woe dear readers:

1. Don't procrastinate!

2. Pre-wash your fabrics before sewing!

3. Get a nice job with a good work-life balance that allows plenty of time for sewing.

Now, if you'll excuse me, I've got to go give a dog an enema.  Glamour!